BCCC Tech Session
Alex Toline's 1978 MGB - Session #1
Alex Toline's 1978 MGB - Session #1


© 2022 British Car Club of Charleston. All Rights Reserved.
Alex borrowed Peter Steele's trailer and brought his MGB to the Rosato garage. We took a quick look at the car and made a list of parts to buy. The right rear brake shoes were covered with oil, indicating a bad seal. So new shoes and a new seal was ordered.
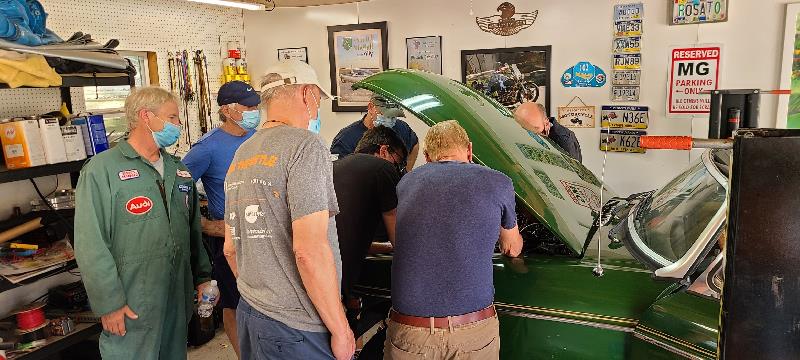
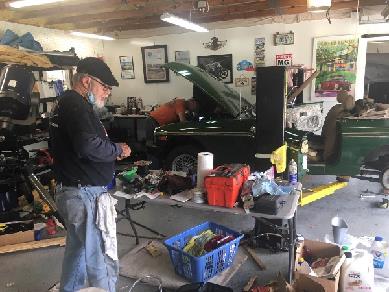
Our first Tech Session was Sunday 3/14/2021. We had a great turnout. We actually had to say sorry to two people. We wanted to limit it to eight people. Andy Beall, Frank Neill, Craig Ferrer, Don Durham, Thomas Moschel, Torsten Kunze, Alex Toline and myself were there. The weather was fantastic so we were able to open the garage doors.
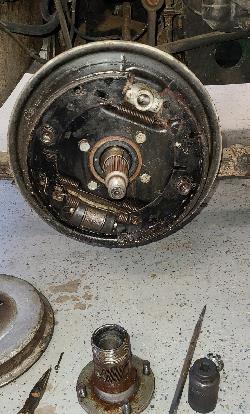
We pulled the plug on the differential to find no oil. So we took off the right rear wheel, pulled the pin on the castle nut and used the impact wrench to remove the nut. We didn't need a puller to pull the hub. After some prying, we got the seal out. The springs and shoes on both sides were removed. We took off the brake cylinders and decided that they should be replaced.
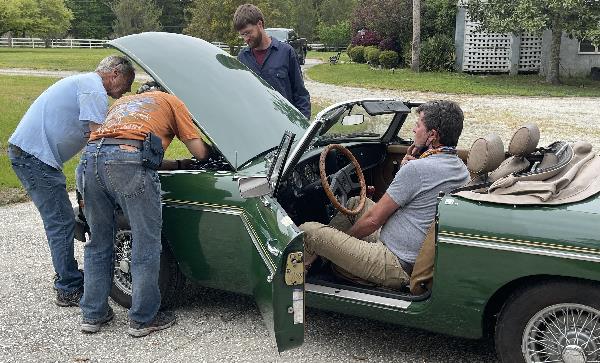
We changed the oil and filter in the engine. With the plugs pulled, the engine turned over easy by hand, which was a very good sign. When we took the distributor cap off, there was moisture under the cap and a lot of corrosion. The original electronic ignition had been replaced with an aftermarket. Alex bought a Pertronix solid state ignition. With Pertronix, all the electronics are under the cap. It was a chore to remove the distributor from the engine. Corrosion had locked in place. But we did finally get it out. The Pertronix Alex ordered didn't include the part that goes on the shaft. So Alex is going to order the Pertronix that includes the baseplate of the distributor.
Our first Tech Session was Sunday 3/14/2021. We had a great turnout. We actually had to say sorry to two people. We wanted to limit it to eight people. Andy Beall, Frank Neill, Craig Ferrer, Don Durham, Thomas Moschel, Torsten Kunze, Alex Toline and myself were there. The weather was fantastic so we were able to open the garage doors.
We pulled the plug on the differential to find no oil. So we took off the right rear wheel, pulled the pin on the castle nut and used the impact wrench to remove the nut. We didn't need a puller to pull the hub. After some prying, we got the seal out. The springs and shoes on both sides were removed. We took off the brake cylinders and decided that they should be replaced.
We changed the oil and filter in the engine. With the plugs pulled, the engine turned over easy by hand, which was a very good sign. When we took the distributor cap off, there was moisture under the cap and a lot of corrosion. The original electronic ignition had been replaced with an aftermarket. Alex bought a Pertronix solid state ignition. With Pertronix, all the electronics are under the cap. It was a chore to remove the distributor from the engine. Corrosion had locked in place. But we did finally get it out. The Pertronix Alex ordered didn't include the part that goes on the shaft. So Alex is going to order the Pertronix that includes the baseplate of the distributor.
We put the battery that was in Steve Smiths TR6 into the MGB. It took longer that we, well I, expected spinning the engine before we saw oil pressure. But the gauge finally did jump up to 50psi. Then we noticed a fuel leak at the pump in the rear of the car. We replaced what looked the the leaky hose but it turned out to be a crack in the plastic near the hose. So a new fuel pump went on the to buy list.
So when the list of ordered parts come in, we'll have another Tech Session. We all had a great time. Thanks Tom Moschel for the pictures.
So when the list of ordered parts come in, we'll have another Tech Session. We all had a great time. Thanks Tom Moschel for the pictures.
Spinning the engine with the plugs out after the oil change looking for oil pressure.
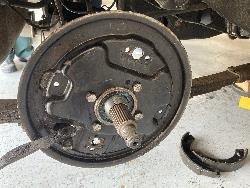
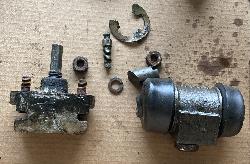
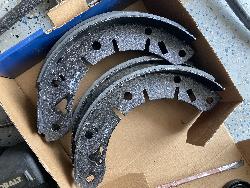
Rear brakes stripped. Ordering new adjusters and wheel cylinders. Have new brake shoes.
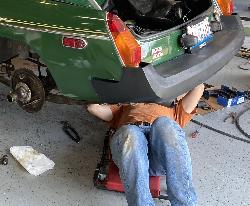
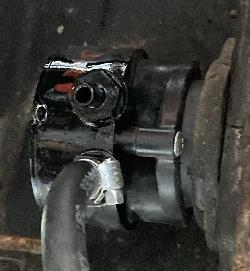
Checking out the fuel leak at the pump.
Determined it was a small crack near the hose connection.
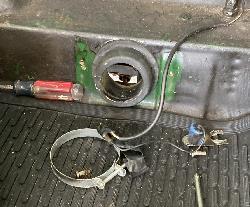
We unclamped the fuel pump from inside the trunk then pushed it through.
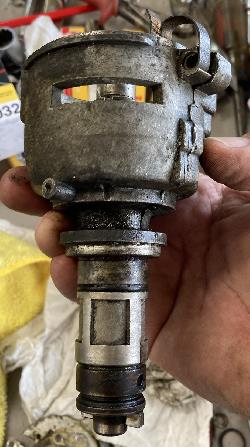
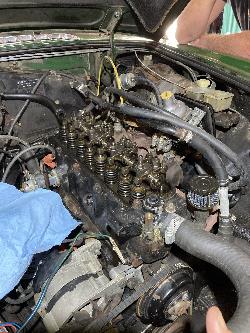
It was a struggle to get the distributor out of the engine. There was a lot of corrosion and moisture under the cap. The wire to the original electronic ignition were cut and an aftermarket installed. Now were putting a 3rd generation Pertronix ignition in.
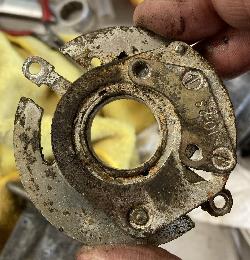
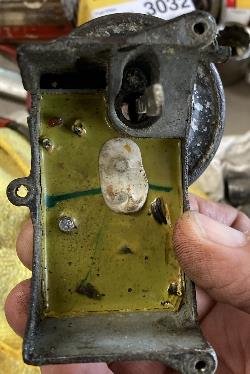
The base plate in the distributor was pretty corroded. The new Pertronix includes the base plate.
With a new shipment of parts for Alex Toline’s MGB, Frank Neill, Tony Girlardo Alex and myself were set to get the car on the road. With the new rear brake cylinders, adjusters and springs, we already had the new shoes, we put the rear brakes back together. With the new seal on the right side of the differential, we drained it and pulled the cover to check it out. There was a tense moment when the last bolt, it is ALWAYS the last bolt, didn’t want to come off. Alex suggested using the impact wrench on a low setting which did the trick. Everything looked good so we used a new gasket and put the cover back on and filled it. We replaced all the rubber lines in the front and rear brakes, put the drums back on the rear and bled the entire brake system. After getting all the air out of the system, we adjusted the rear brakes and the brakes all worked great. We put all the wire wheels back on the car and took it off the lift.
Next we moved to the engine. Alex bought a new distributor which included a new electronic ignition, the third one for the car. But with this one, all the electronics is under the cap so there were only two wires to hitch up. With a confirmation from Darryl Beech, it was determined that the new coil did not need a ballast resistor, again simplifying the wiring. All we really needed was a 12 Volt source. Being right near the fuse block, we taped into it. We rotated the distributor such that when the #1 cylinder, the one at the front of the engine, was at top dead center, the timing marks on the crankshaft pulley aligned, the distributor rotor was roughly pointing at the #1 spark plug wire. It was actually 180 degrees off but that was OK since the distributor rotates half as fast as the engine. If we did rotate the engine one full revolution, the distributor rotor would have pointed to the #1 plug. This got the timing close enough so the engine should start. With the timing light wired, we cranked the engine. The timing light didn’t flash. It should flash when the #1 spark plug fires. The simplest reason was that we didn’t have voltage at the distributor. We checked the voltage at the fuse we taped into, nothing. We checked the next fuse, nothing. I knew there was voltage going to the old ballast resistor so we taped into this wire instead. One more try to start and BOOM, we had a running engine! It coughed and spit for a while but got noticeably better the more it ran. We figured it was burning the oil we shot in the cylinders and it was burning off build-up in the carburetor. Alex pulled the car out of the garage. Success!, engine, clutch, fuel pump and brakes all working.
We had also started replacing the door window outside seals. Frank had done some research over the past week to determine what needed to be removed to replace the seal. It entailed removing the door panels and drilling out the rivets holding the seal. This needs to be finished. But more importantly, the tachometer, right front head light, brake lights, temperature gauge, directional, radio and flashers do not work, major electrical problems. Our starting point at the next Tech Session will be at those two fuses that weren’t getting power. Just fixing them may clear up a lot. The tentative date for the next Tech Session is Sunday April 11. Come and learn how to decipher a wiring diagram.
Thanks to Frank for the pictures.
MGB Tech Session—Get It Runnin’ - Session #2
Tech Session #3
April 11, 2021
April 11, 2021
We had another busy Tech Session working on Alex's MGB. The carburetor got rebuilt, the door seals got installed, the rear axle straps replaced and many bad electrical connections under the hood cleaned up. Thanks to Will Rae and Frank Neill for the help.
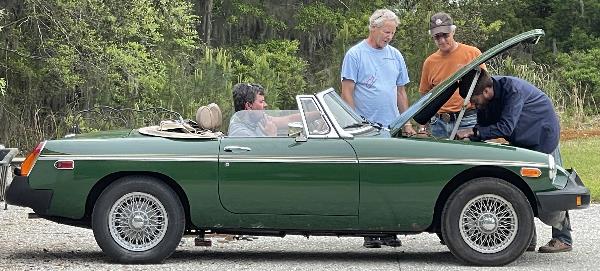
It's not 100% yet but it drove pretty good!